As a financial professional, I want to use multi-purpose tokens to create an asset-backed token in order to profit from resale transactions.
A Multi-Purpose Token (MPT) is a compact and flexible object that offers the best aspects of fungible and non-fungible tokens. It is the next generation of tokenization on the XRPL. Notable features include:
- MPTs store metadata directly on the XRPL blockchain, with the option of linking to additional off-chain data. Once created, the metadata is immutable.
- MPTs can have a fixed token supply, with a cap on the maximum number of tokens.
- MPT issuers can collect transfer fees each time the token is traded.
- MPTs can be non-transferable, for use cases such as airline credits.
- MPTs also allow advanced compliance features.
Requires the MPTokensV1 amendment. Loading...
This page is written for product managers, business stakeholders, and non-technical users who want a high-level use case and an easy way to generate an MPT using the downloadable MPT Generator utility.
To learn about MPTs in general, go to the Concept page. For developer-focused content and code examples go to the Tutorial.
Concept: Multi‑Purpose Tokens
Read the concept documentation to learn more about Multi-Purpose Tokens.
Tutorial: Issue a Multi‑Purpose Token
Step‑by‑step, hands‑on tutorial to issue an MPT using the XRP Ledger SDKs.
MPT Generator
Download the MPT Generator and learn how to create an asset-backed Treasury bill.
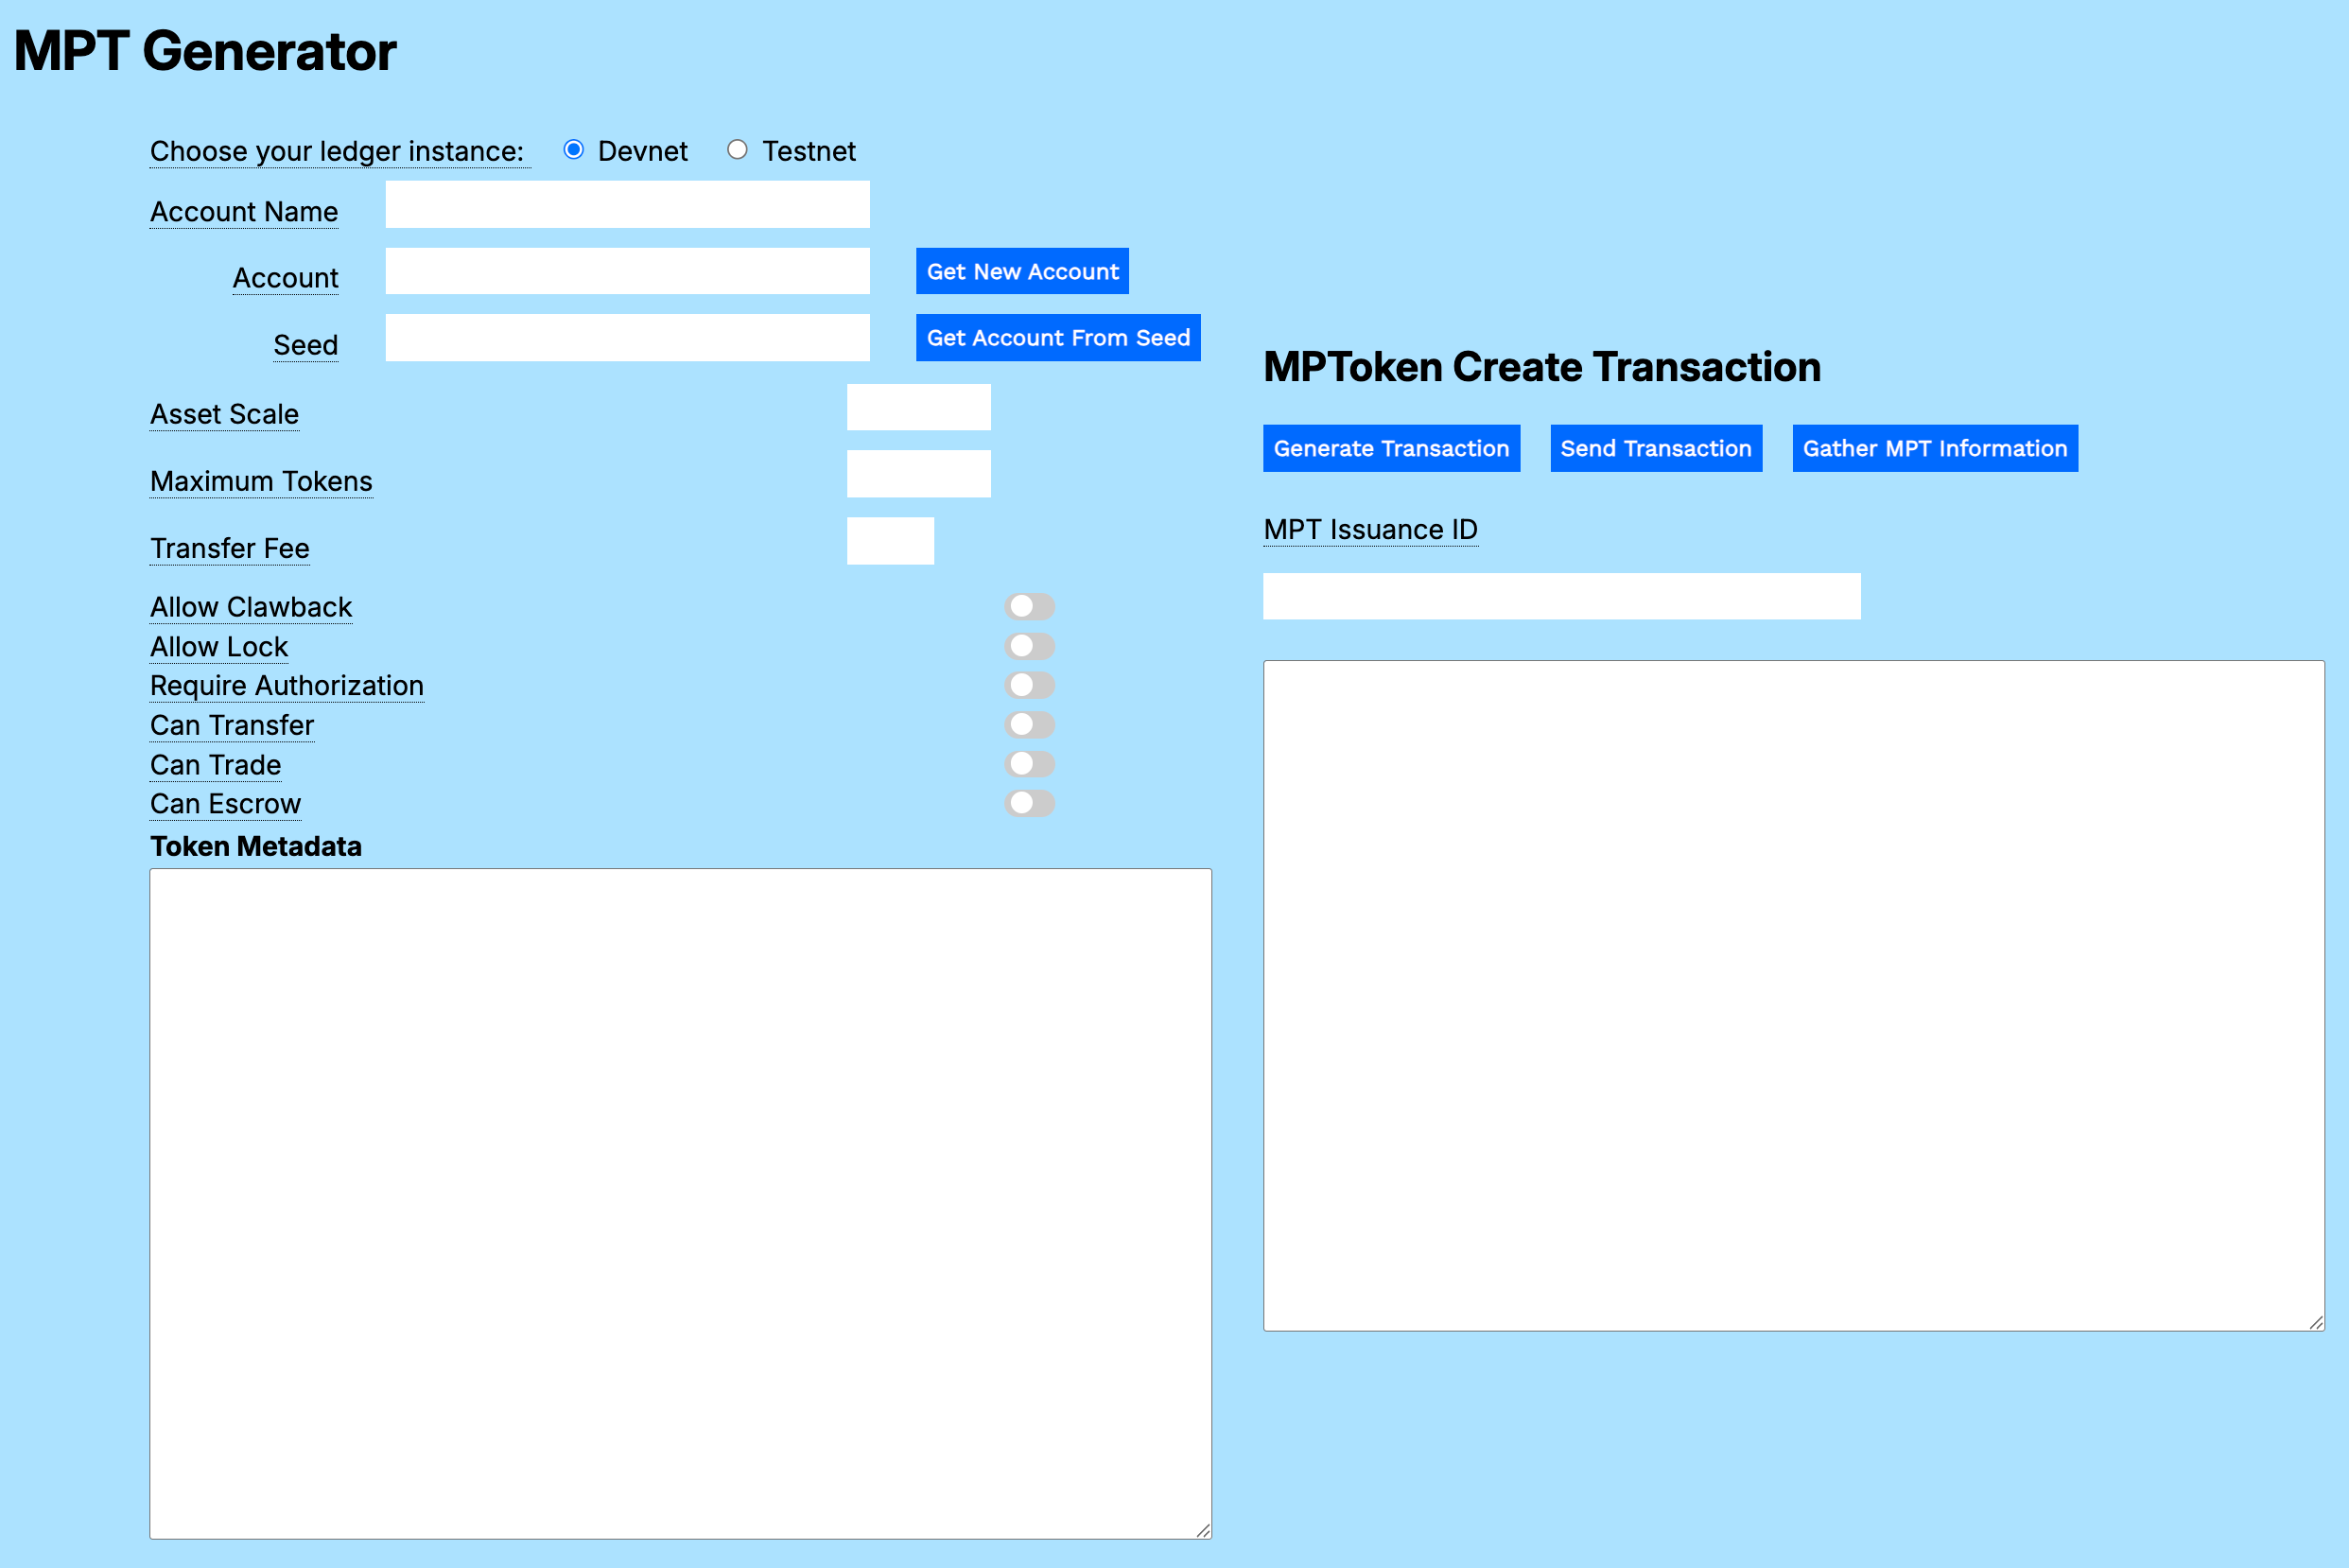
You can download a standalone version of the MPT Generator as sample code.
In practice, you want to use an Issuer account configuration to issue an MPT, but you can try the form with a new, unconfigured account and the transaction works fine. A T-bill is one example of the many types of asset you can create and trade on the XRP Ledger.
A US Treasury bill (T-bill) is a short-term debt security issued by the US government. T-bills are considered a safe investment because they're backed by the US government. T-bills are appealing to investors in American states that have high income tax because the interest earned is exempt from state and local taxes. See Treasury Bills In Depth.
You can use the Account Configurator to experiment with the settings for a T-bill issuing account in a sandbox environment. When you are satisfied with your configuration, you can create an account on XRPL Mainnet to begin trading.
To create a new MPT Issuer account:
- In the Account Configurator utility, choose ledger instance Devnet.
- Click Get New Account.
- Choose account configuration template Issuer.
The form sets the standard flags for an Issuer account and displays additional configuration fields.
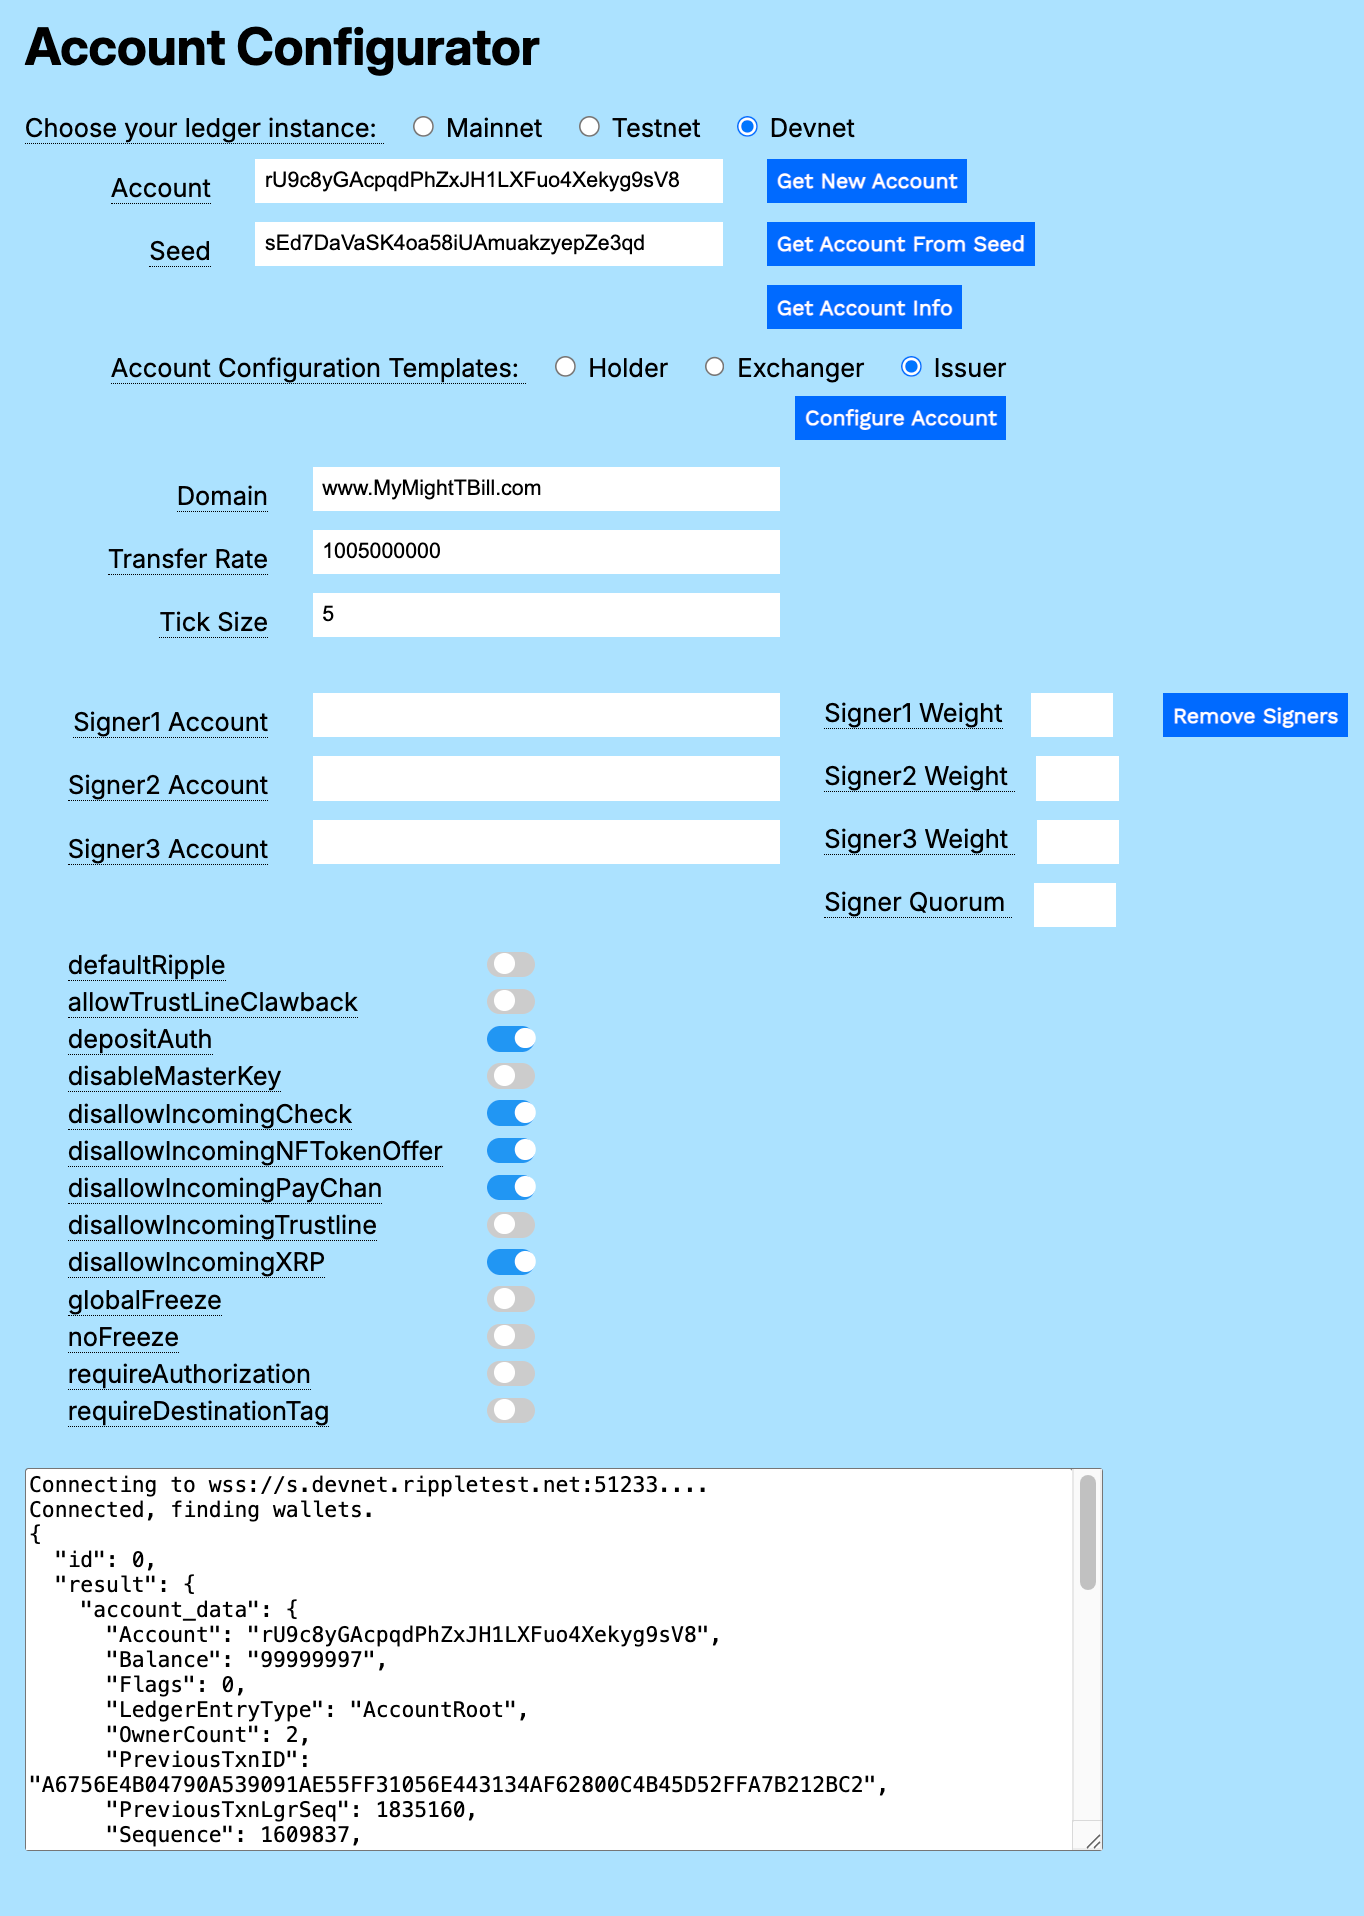
| Parameter | Value | Description |
|---|---|---|
| Domain | TOML domain | URL to the server where your TOML file is stored. For an experimental account, you can enter any URL. When you configure the account, the domain is automatically converted to a hexidecimal string. If you reconfigure the account, you need to enter the original domain again. |
| Transfer Rate | 1005000000 | A value between 1000000000 and 2000000000 representing the percentage value you collect when a holder transfers one of your issued tokens. A Transfer Rate of 1005000000 returns .5% of the transfer value to this account. See Transfer Rate. |
| Tick Size | 5 | Round offers to this many significant digits. Valid values are 3 to 15, or 0 to disable. |
| Signer Accounts | account addresses | Accounts that have a vote regarding approval of transactions for this account. |
| Signer Weights | int | The weight of each signer's signature, relative to other signers. |
| Signer Quorum | int | The required minimum value of signer weights to approve a transaction. |
Use the sliders to configure the standard suggested flag settings. You want to be careful about what other accounts are able to send to your account, so you should disallow most types of transfers. One exception is trust lines, which you do want other accounts to be able to create to your issuing account.
One difference between an MPT issuer and other tokens is that there is no concern about rippling, since MPTs are self-contained. If the only purpose for this issuing account is to issue MPTs, you do not have to enable rippling by default.
| Flag | Purpose |
|---|---|
| depositAuth | Require authorization for another account to deposit to this account. |
| disallowIncomingCheck | Prevent other accounts from sending checks to this account. |
| disallowIncomingNFTokenOffer | Prevent other accounts from sending NFTokenOffers to this account. |
| disallowIncomingPayChan | Prevent other accounts from creating Payment Channels to this account. |
| disallowIncomingXRP | Prevent other accounts from sending XRP to this account. |
Once you've set your preferred values in the account configurator, click Configure Account to finish preparing your account to issue T-bills.
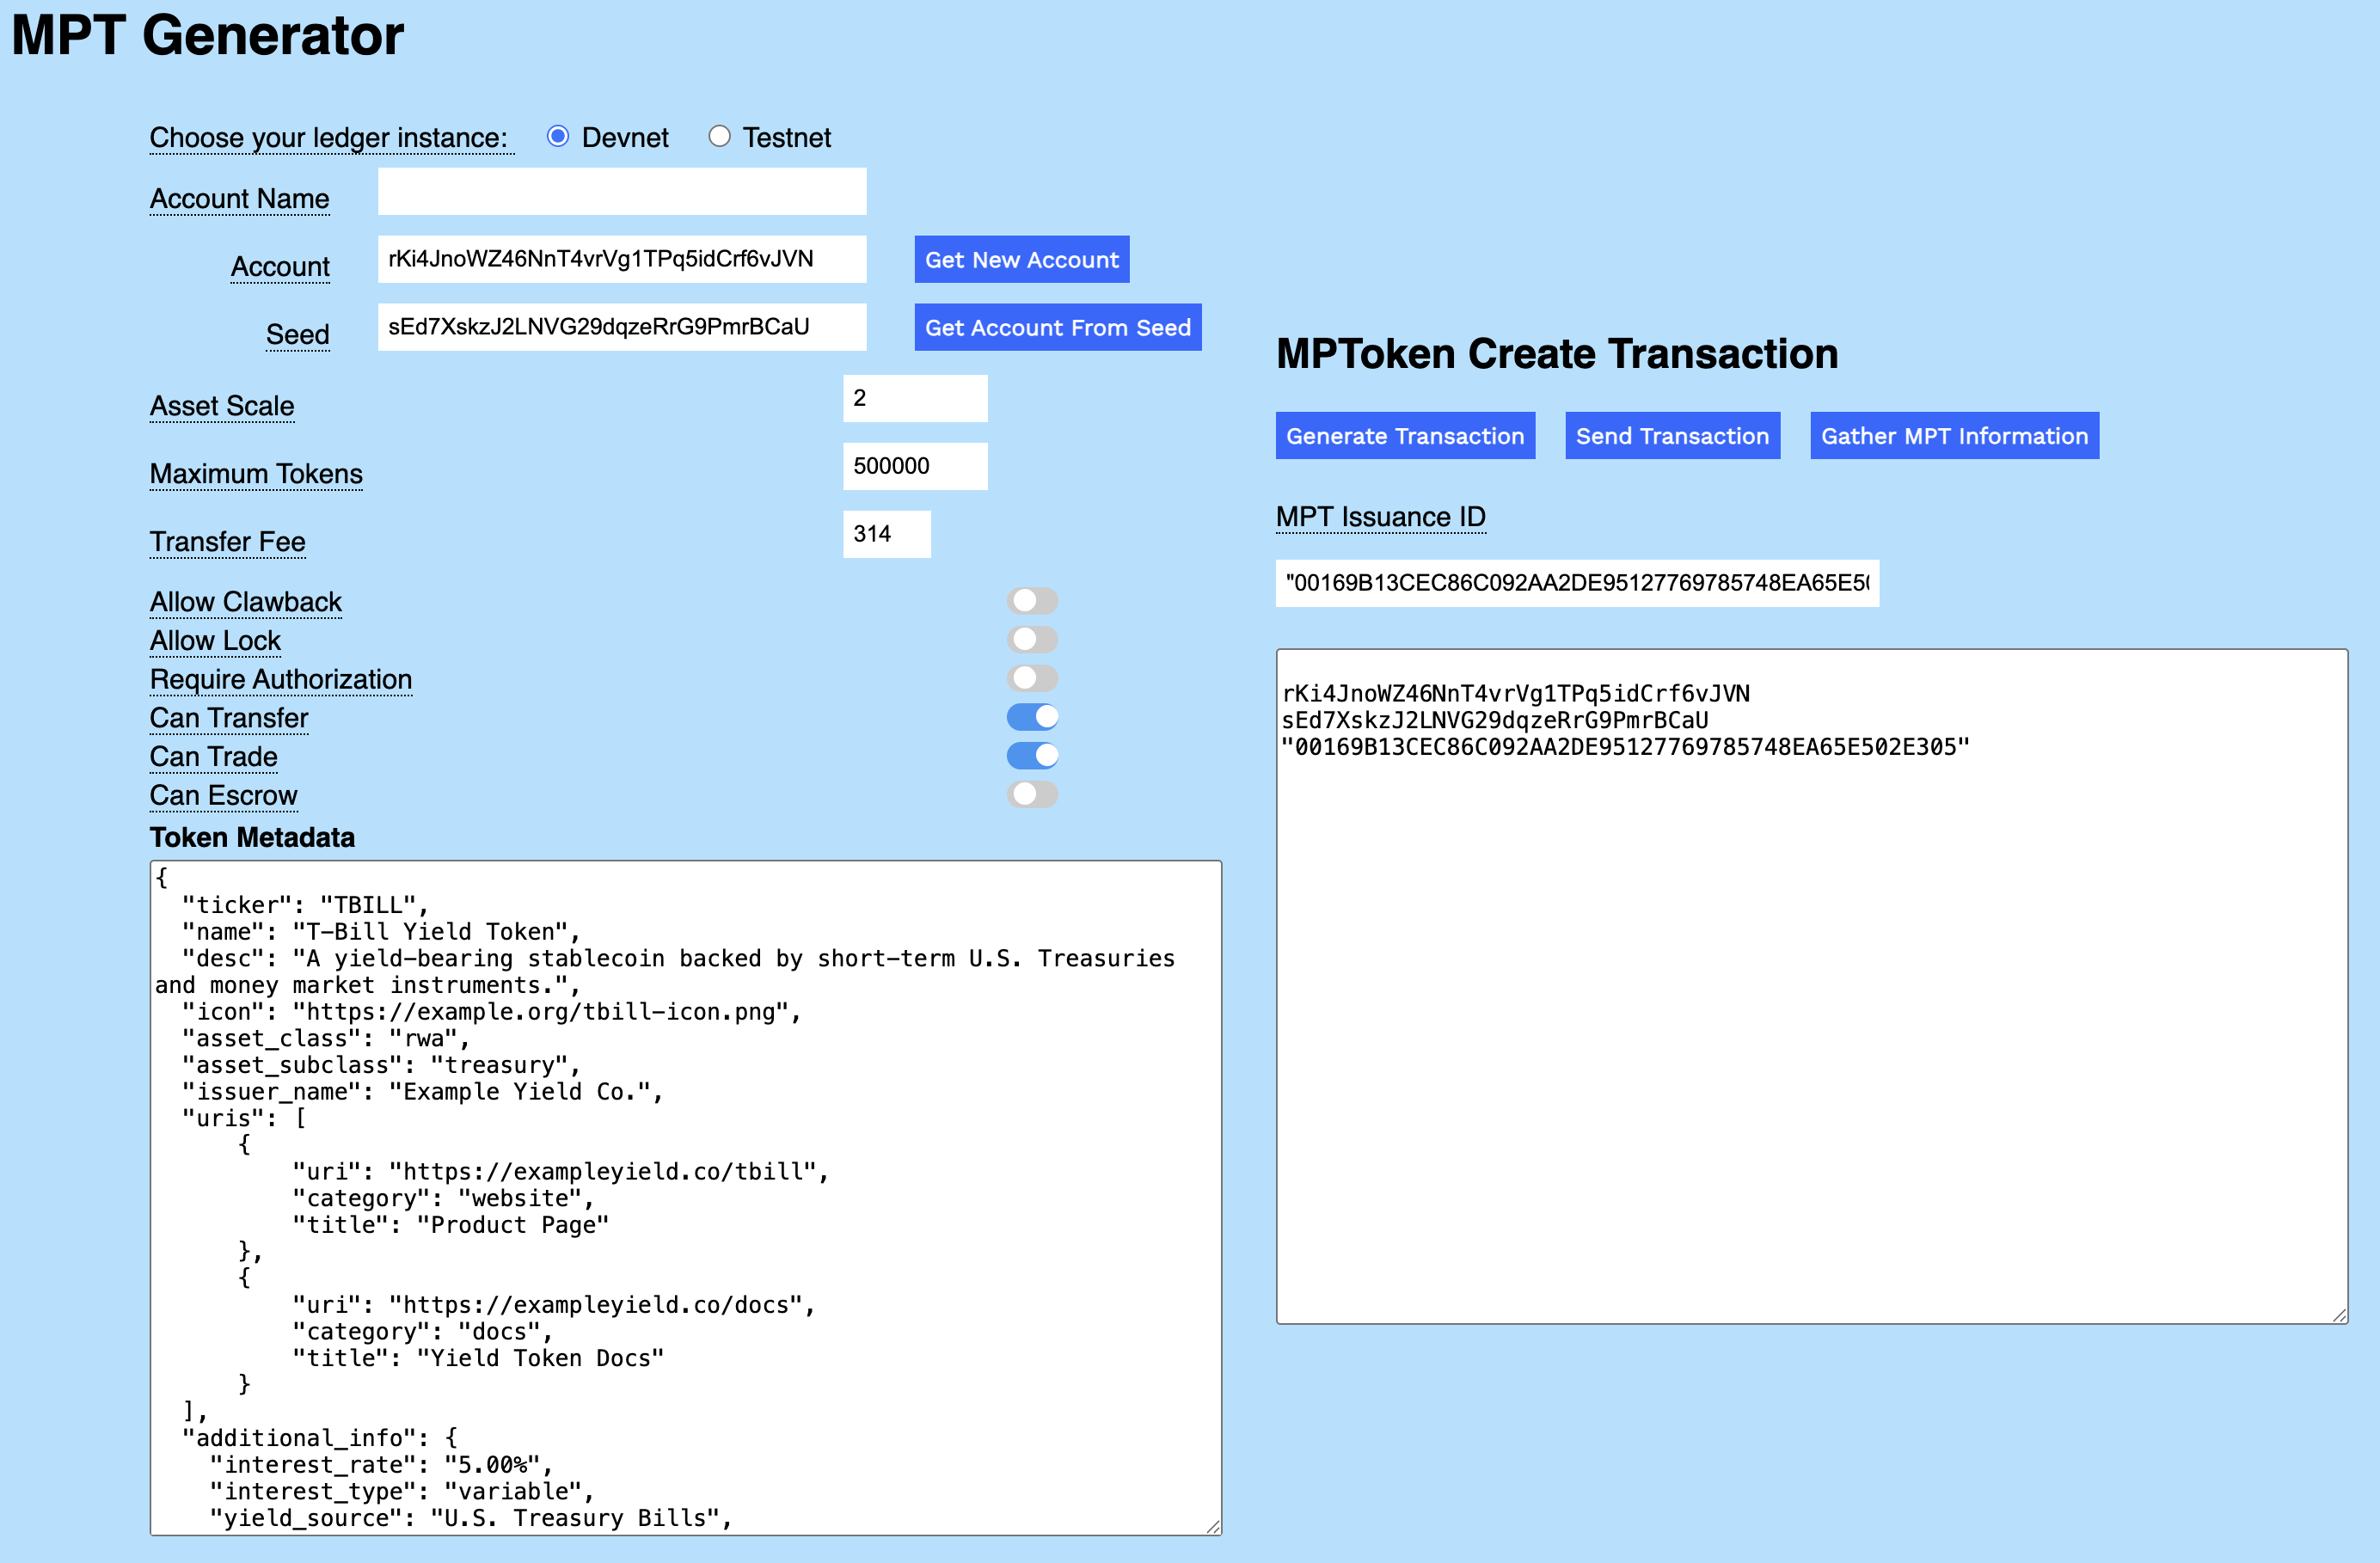
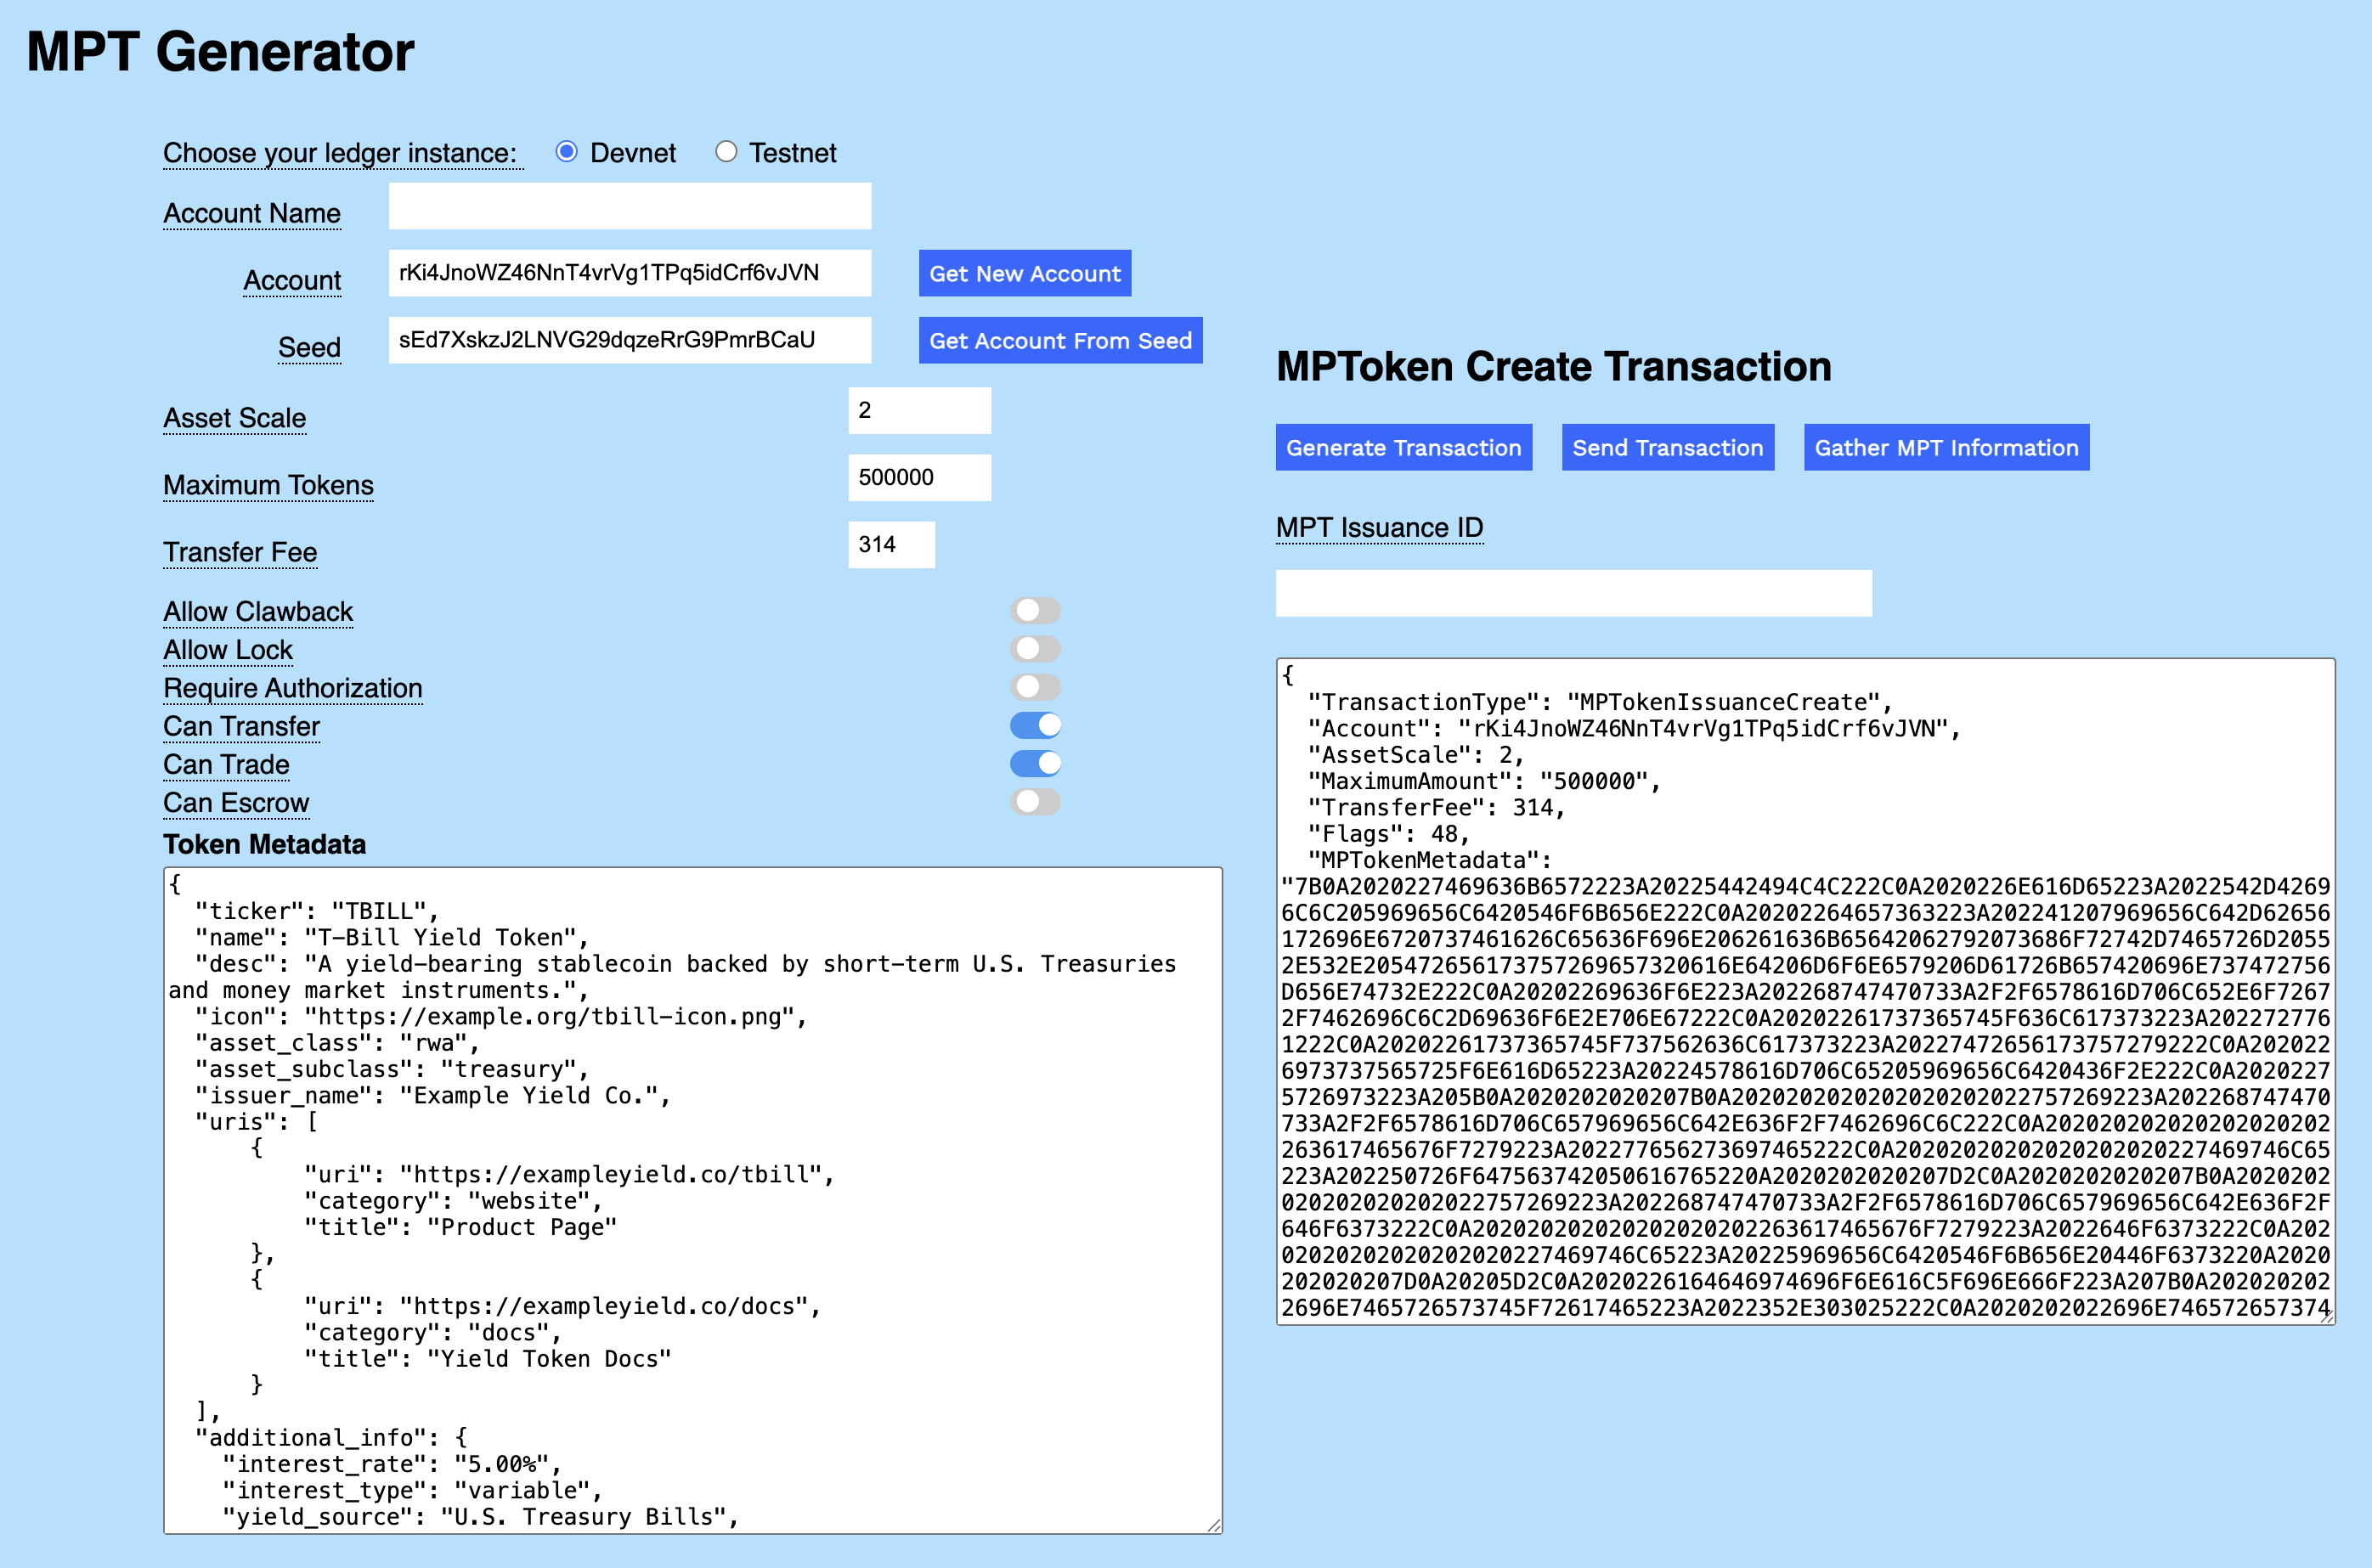
You can represent a US Treasury Bill (T-bill) on the XRPL by creating a multi-purpose token. The example below shows random possible values you might use as a starting point. Adjust as needed for your use case.
| Parameter | Value | Description |
|---|---|---|
| Asset Scale | 2 | The difference, in orders of magnitude, between a standard T-bill unit and the corresponding fractional unit. |
| Maximum Tokens | 500000 | The maximum number of this T-bill MPT that will ever be issued by this account. |
| Transfer Fee | 314 | Fee collected when the T-bill MPT is transferred to another account. |
As an example, you might set the following flags when creating your T-bill MPT.
| Flag | Description |
|---|---|
| Can Transfer | A holder can transfer the T-bill MPT to another account. |
| Can Trade | A holder can trade the T-bill MPT with another account. |
The metadata you provide is what distinguishes your token from other MPTs. The following JSON definition shows sample configuration information for a T-bill. Copy and paste the data, or your own metadata, into the Token Metadata field. Once set, MPT metadata is immutable.
{
"ticker": "TBILL",
"name": "T-Bill Yield Token",
"desc": "A yield-bearing stablecoin backed by short-term U.S. Treasuries and money market instruments.",
"icon": "https://example.org/tbill-icon.png",
"asset_class": "rwa",
"asset_subclass": "treasury",
"issuer_name": "Example Yield Co.",
"uris": [
{
"uri": "https://exampleyield.co/tbill",
"category": "website",
"title": "Product Page"
},
{
"uri": "https://exampleyield.co/docs",
"category": "docs",
"title": "Yield Token Docs"
}
],
"additional_info": {
"interest_rate": "5.00%",
"interest_type": "variable",
"yield_source": "U.S. Treasury Bills",
"maturity_date": "2045-06-30",
"cusip": "912796RX0"
}
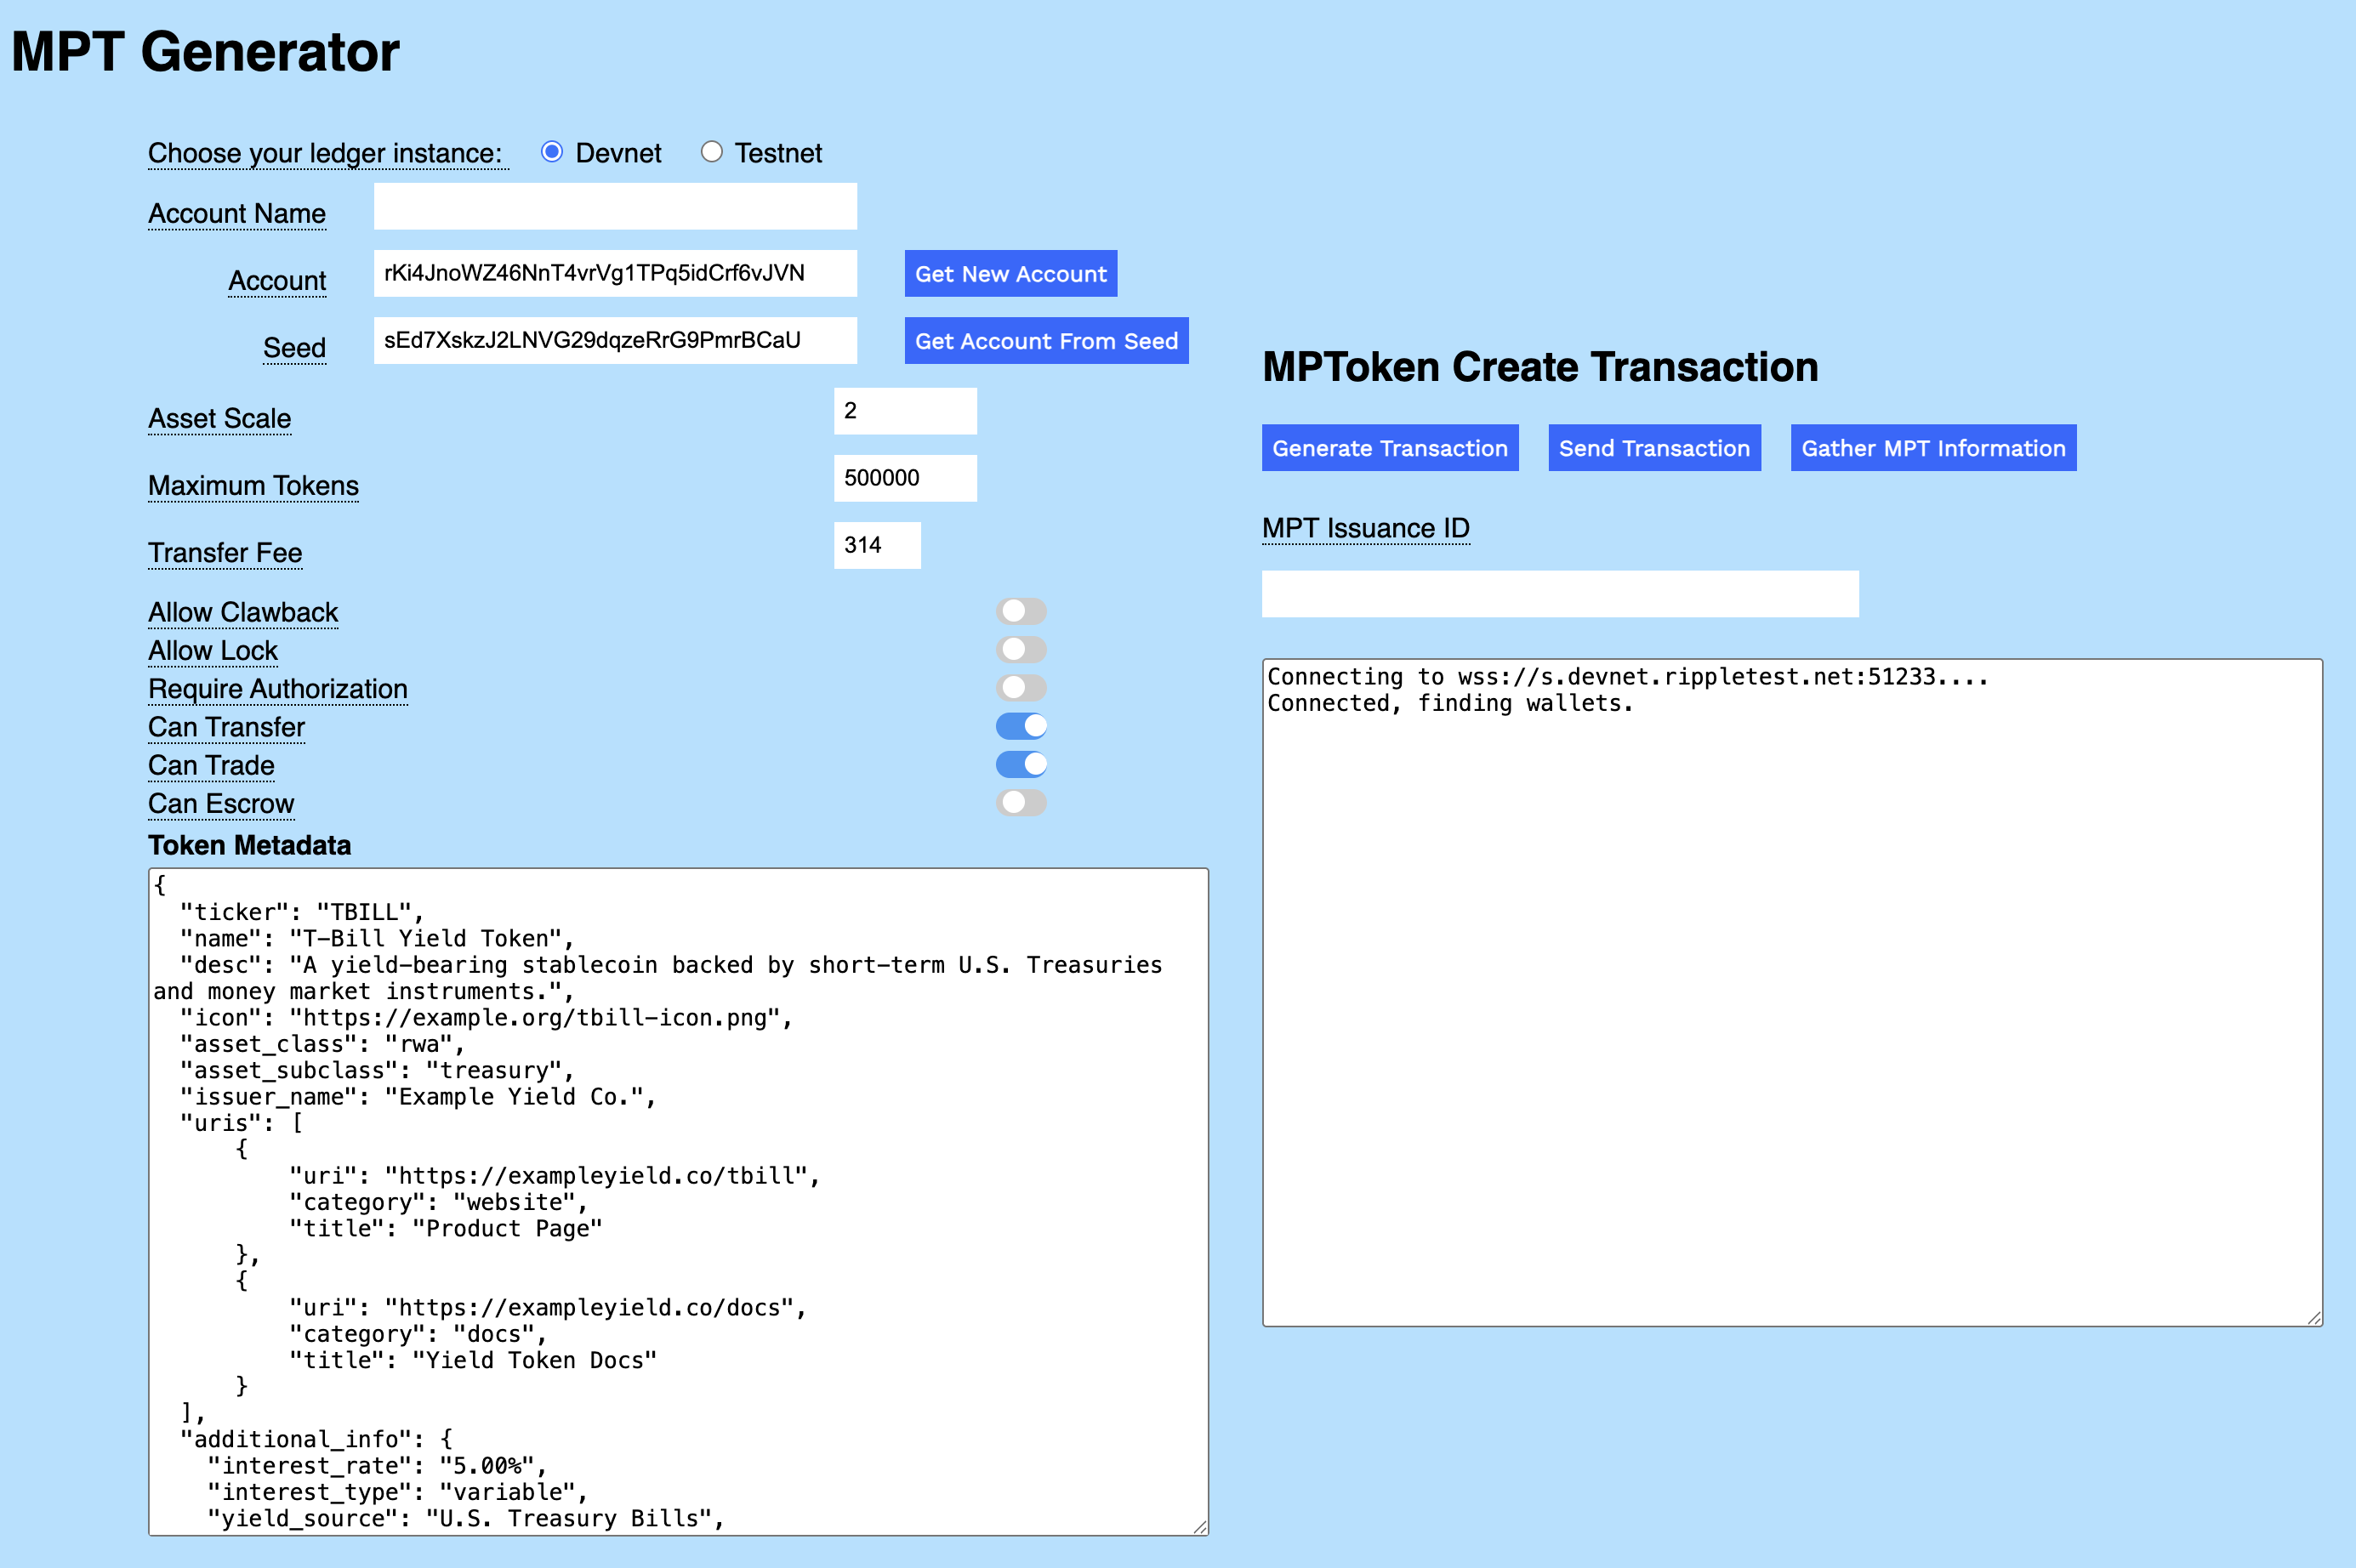
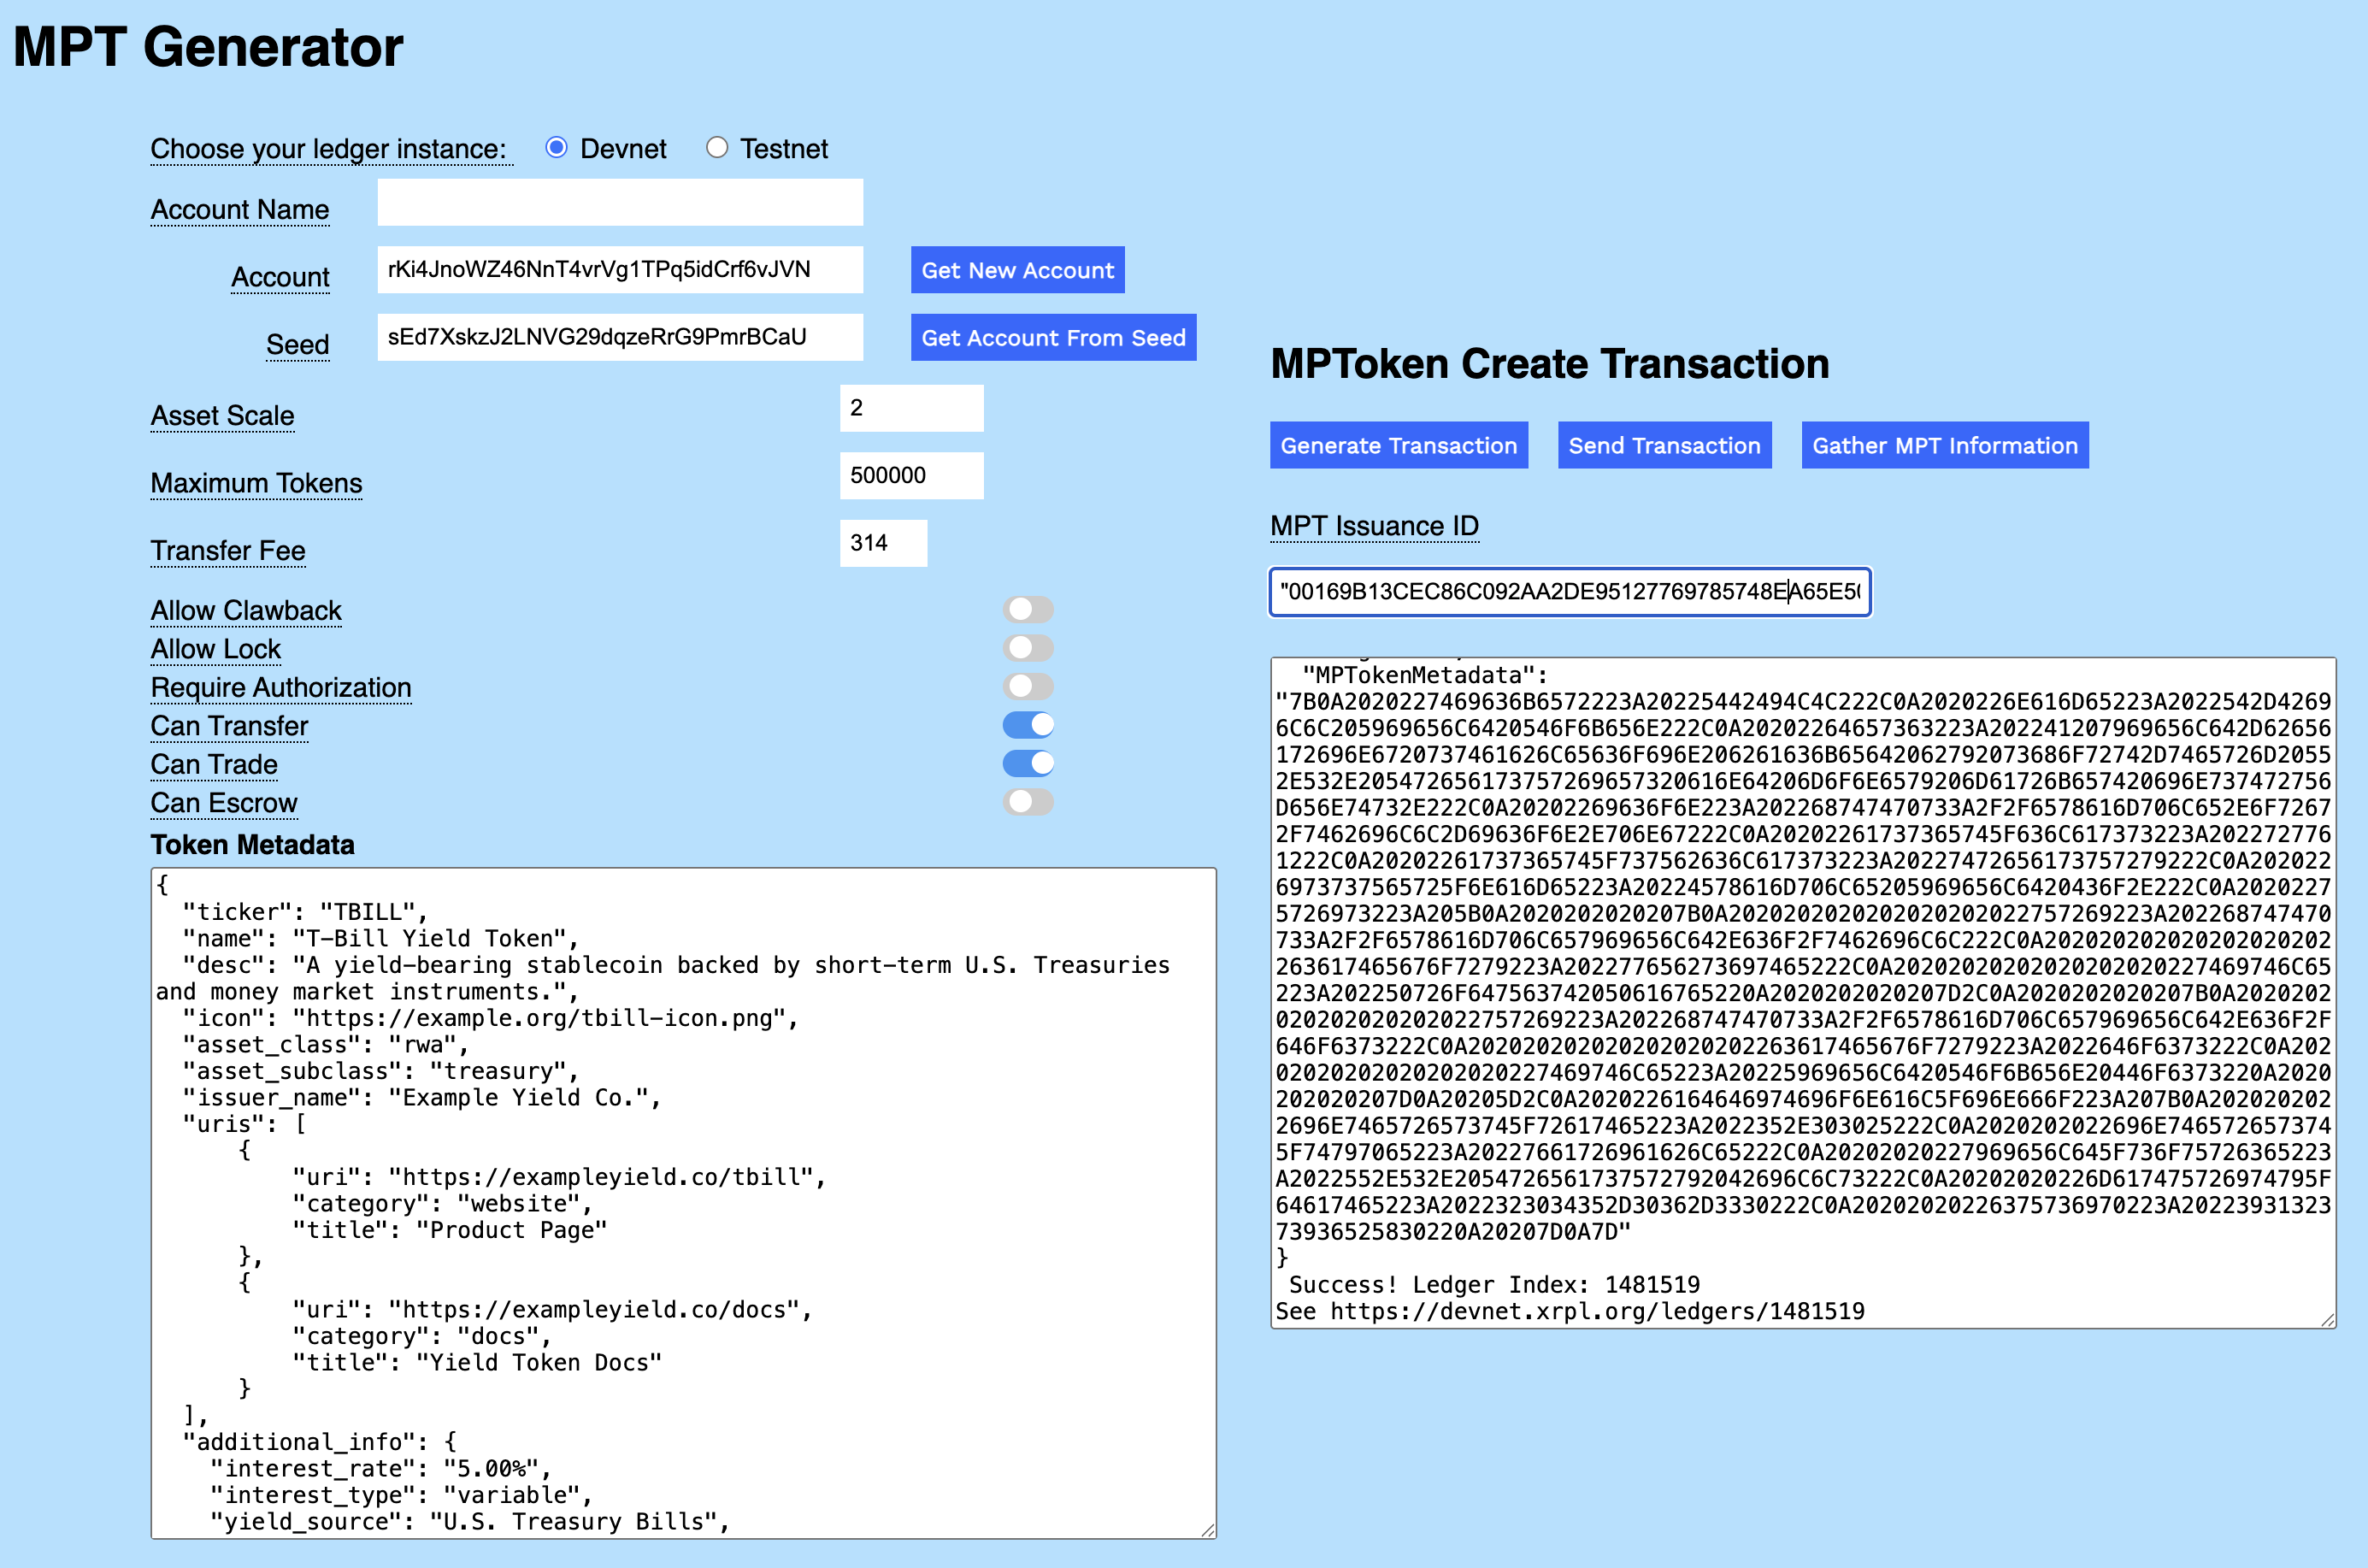
}Once you've set your preferred values, click Generate Transaction to see the transaction syntax for your settings. The Flags field displays the sum of the flags you've selected, and the MPTokenMetadata is converted to a hexidecimal string.
To create your T-bill MPT, click Send Transaction. When your transaction succeeds, a link to the record in the XRPL Explorer is displayed in the result field.
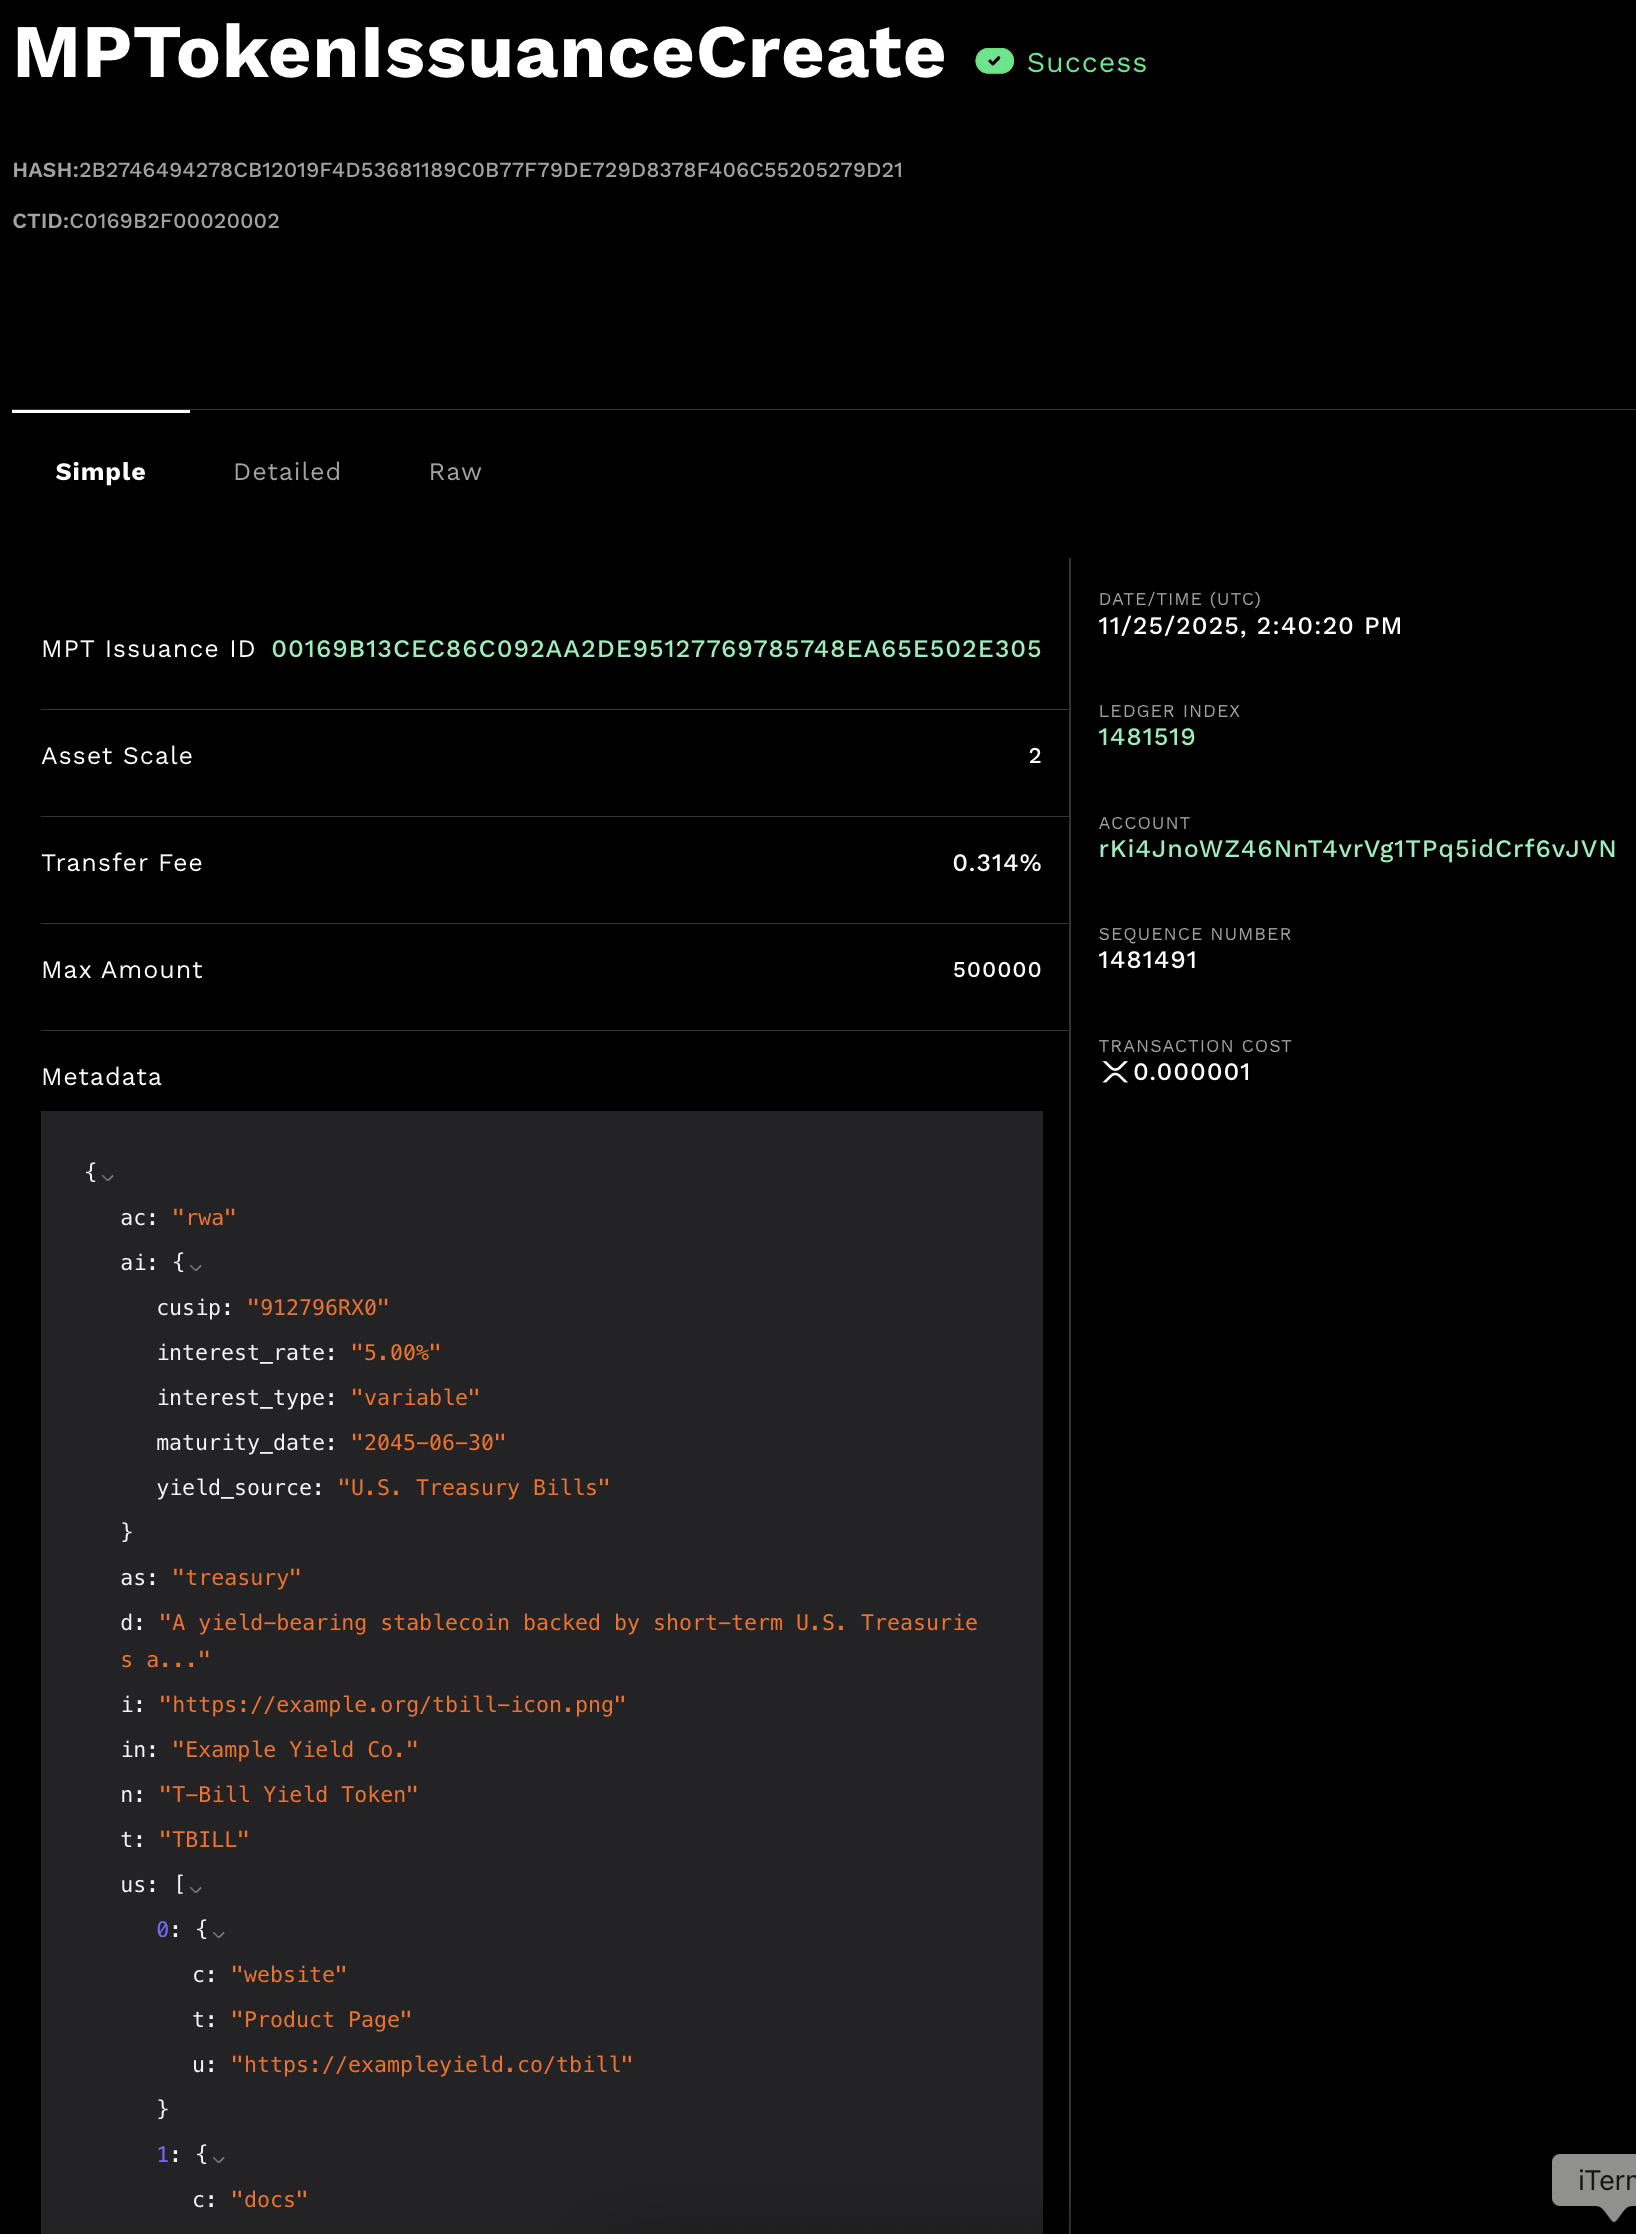
Follow the link and scroll down to find the MPTokenIssuanceCreate transaction for your new T-bill in the Explorer.
Click Gather MPT Information to copy the account information and MPT Issuance ID to the result field. Copy the information and save it to send the MPT to another account as shown in Send a Multi-Purpose Token (MPT).