Discover how to create and manage accounts on the XRPL Testnet and master the art of transferring XRP using Python. Whether you’re a budding coder or a crypto enthusiast looking to expand your skills, this tutorial is your gateway to understanding the basics of XRP transactions through a simple and interactive approach.
Before diving in, you’ll need to lay the groundwork. Start by creating a dedicated folder on your local machine to house your project. Then, gear up by installing the essential Python library for interacting with the XRP Ledger:
pip3 install xrpl-pyNext, equip yourself with the Quickstart Samples by downloading and expanding the archive. This treasure trove contains all the code examples you’ll be exploring. Remember, these magical scripts are your key to unlocking the potential of the XRP Ledger on the Testnet. It is worth noting that additional Python3 dependencies will be required such as tkinter.
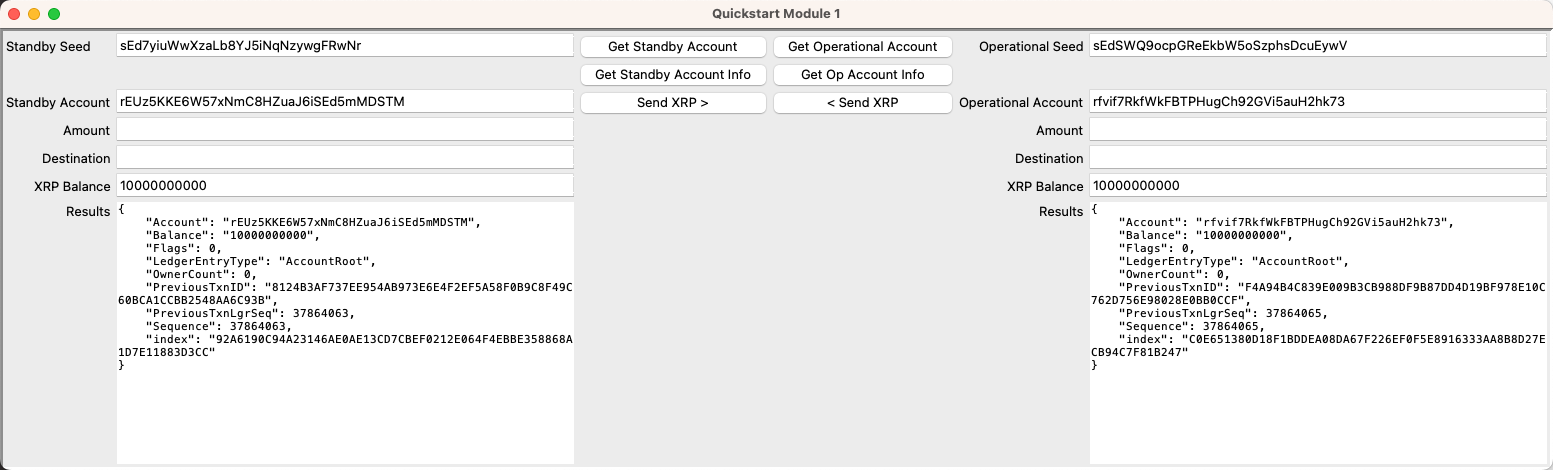
The adventure begins with the creation of test accounts. These accounts are special; they're funded with 10,000 test XRP, allowing you to experiment without risking real funds. Launch the lesson1-send-xrp.py script using the following command to get started:
python3 lesson1-send-xrp.py- Generate Standby and Operational Accounts: Click the respective buttons to create these accounts, each equipped with its unique seed value.
- Secure Your Seeds: Copy and paste the seed values to a safe place. These seeds are your secret keys to accessing the accounts later on.
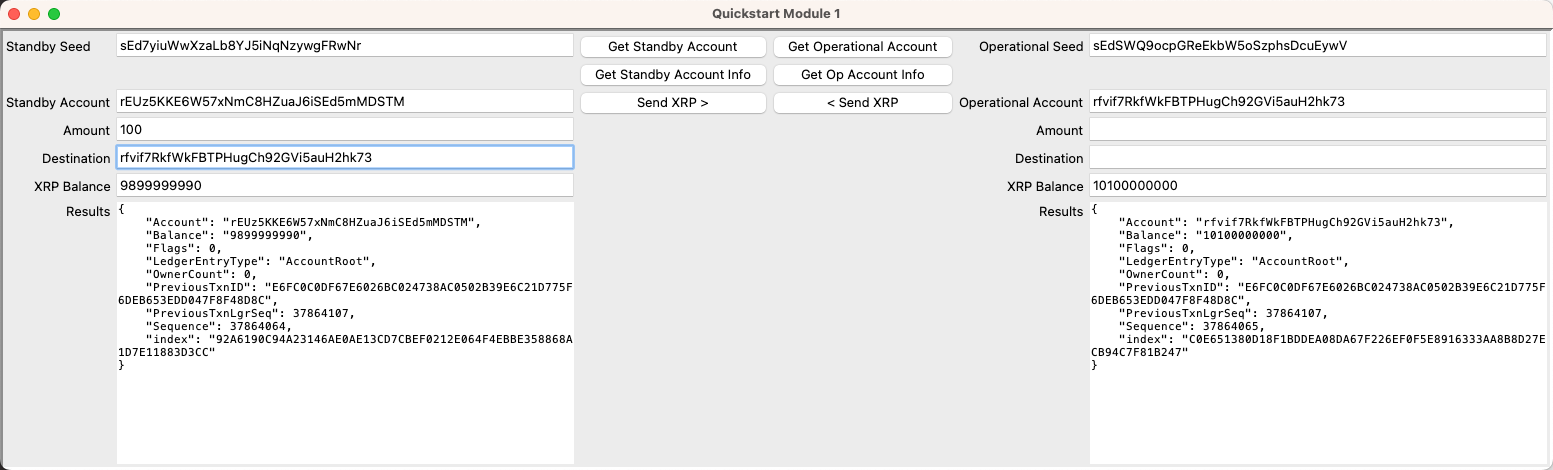
With your accounts at the ready, it's time to send XRP payments using Python back and forth. Experience the thrill of moving digital currency with just a few clicks:
- From Standby to Operational: Enter the XRP amount, paste the operational account's address into the destination field, and watch the magic happen.
- Back to Standby: Reverse the roles and transfer XRP from the operational account back to the standby account, completing the circle.
Dive deeper into the realm of code with the mod1.py module. This script is the heart of the operation, containing functions to create accounts, fetch account information, and transfer XRP. It's a showcase of how Python and the XRPL library work together to perform transactions on the XRP Ledger.
The user interface, crafted with Tkinter, provides a simple and interactive way to execute transactions. It features entry fields for account details, buttons for fetching accounts and sending XRP, and text areas to display the outcomes. This script is your control panel for navigating the XRP Ledger.
With the setup complete and the basics under your belt, you're ready to embark on your journey through the world of XRP transactions. This guide is just the beginning; the real adventure lies in experimenting, learning, and exploring the vast possibilities of cryptocurrency and blockchain technology.
So, fire up your Python environment, run the scripts, and step into the role of a crypto wizard. As you transfer XRP between accounts, remember that you're not just moving digital currency—you're navigating the cutting-edge landscape of decentralized finance, armed with code and curiosity.
If you've got any questions you can join the developer Discord channel to connect with other members of the XRP Ledger community and continue your building journey alongside others.